Leaderboard


Popular Content
Showing content with the highest reputation on 09/22/20 in all areas
-
Application Name: SWAG - Secure Web Application Gateway Application Site: https://docs.linuxserver.io/general/swag Docker Hub: https://hub.docker.com/r/linuxserver/swag Github: https://github.com/linuxserver/docker-swag Please post any questions/issues relating to this docker you have in this thread. If you are not using Unraid (and you should be!) then please do not post here, instead head to linuxserver.io to see how to get support. PS. This image was previously named "letsencrypt", however, due to a trademark related issue, it was rebranded SWAG and is being published in new repos. In order to migrate to the new image, all you need to do (at a minimum) is to open the container settings and change the "Repository" field from "linuxserver/letsencrypt" to "linuxserver/swag". If you prefer, you can change the container name to "swag" as well, although it is not required. As long as you keep the environment vars the same and the "/config" folder mount the same, all the settings will be picked up by the new container. Please see here for more detailed instructions: https://github.com/linuxserver/docker-swag/blob/master/README.md#migrating-from-the-old-linuxserverletsencrypt-image1 point
-
Vaultwarden is a unofficial Bitwarden compatible server written in Rust Templated by Selfhosters, used by many. Featured in this video by @SpaceInvaderOne FAQ: Q: I get ` An error has occurred. Cannot read property 'importKey' of null` when trying to login. A: This is expected when trying to login over HTTP, especially in Chrome. This is a security measure by the browser, not a bug.1 point
-
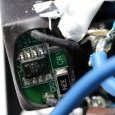
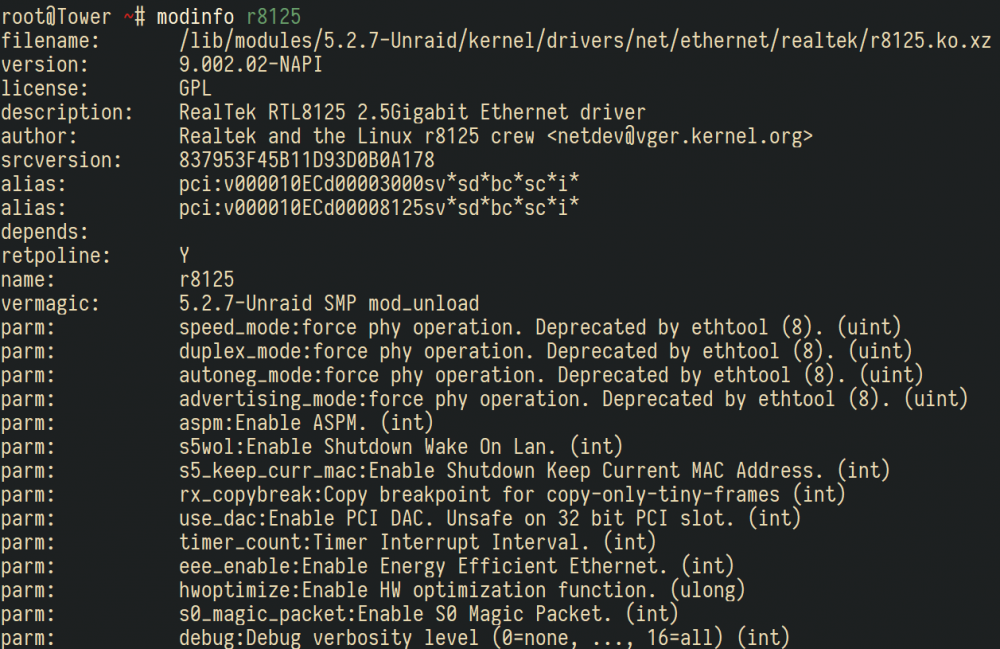
Hi I just build a kernel to support X570 motherboard (mine is msi x570 ace) and latest AMD Ryzen 2 3000 family CPU. 6.8.3 is out, here is the new kernel and some tweaks: Add Vega Reset Patch Add Navi Reset Patch Enable NFSv4 in kernel(God damned, we finnaly get nfsv4 to work) Add R8125 out tree driver. AMD onboard audio/usb controller flr patch. Provide two version (linux-5.5.8 and linux-4.19.108) in case of bug. Notice that linux-4.19.108 still don't have AMD Zen 2 suppport. Download url can be found in the latest comments. For those who want to use NFSv4: NFSv4 have some change compared to v2/v3, it must have root share and the nfs-utils version can't handle it well.You must add this script to UserScript Plugin triggered when array start: #!/bin/bash # Add NFSv4 root echo '"/mnt/user/" -async,no_subtree_check,fsid=0 *(sec=sys,rw,insecure,anongid=100,anonuid=99,all_squash,crossmnt)' >> /etc/exports # Load configuration exportfs -ra # Tunning mkdir -p /var/lib/nfs/v4recovery sed -i 's@/usr/sbin/rpc.nfsd 8@/usr/sbin/rpc.nfsd 32@g' /etc/rc.d/rc.nfsd # Restart Services /etc/rc.d/rc.nfsd restart And if you have trouble mount nfsv4, you can specify mount vers=3 on client. Edit at 2020.01.31 The procedure of compiling kernel(you can compile it in other linux distribute or linux VMs): download kernel sources from kernel.org, notice that should be same or related version of unraid(like 4.19.94 which 6.8.2 used) unarchive the kernel source zip, like kernel-4.19.94/ copy the patches and .config (important!) from unraid server which located at /usr/src (like /usr/src/linux-4.19.94-Unraid/) to step 2 source directory (Optional) copy custom patches like navi patches or others to source directory too apply patches: find . -type f -iname '*.patch' -print0|xargs -n1 -0 patch -p 1 -i use old config : make oldconfig compile the kernel and modules: make -j5 bzImage; make -j5; make -j5 modules installing the modules, then you can find the module directory in /lib/modules: sudo make modules_install Copy the kernel image: cp sources/linux-4.19.94/arch/x86_64/boot/bzImage releases/6.8.2-4.19.94/bzimage (Optional) ThirdParty modules compiling (like nic r8125 outtree driver): enter the thirdparty driver directory compile the module: make -C /lib/modules/4.19.94-Unraid//build M=(pwd)/src modules install the module to direcotry: sudo make -C /lib/modules/4.19.94-Unraid/build M=(pwd)/src INSTALL_MOD_DIR=kernel/drivers/net/ethernet/realtek/ modules_install you can check whether the module exists in /lib/modules/4.19.94-Unraid/kernel/drivers/net/ethernet/realtek/ archive the modules to bzimage: mksquashfs /lib/modules/4.19.94-Unraid/ releases/4.19.94/bzmodules -keep-as-directory -noappend Then you get the bzimage and bzmodules, copy it to unraid server: /boot/
 1 point
 -
This is not a big deal and has been reported before on the general support forum, when a custom controller type is used for SMART you can see all the SMART attributes including temp, but for some reason temp is not displayed on the GUI or dash, other user was using the HP cciss controller and the same happens to me with an LSI MegaRAID controller, so looks like a general issue when using a custom SMART controller type. Note, I'm using two disks in RAID0 for each device here, so I can only choose SMART from one of the member disks form that RAID, still I should be seeing temp from that disk, since all SMART attributes appear correctly, unless the GUI is not using the custom controller type to get the temp.1 point
-
I don't know anything about the ronch Roon docker image, but I do know that Roon is designed to be backed up and restored, so as long as you've made a recent backup you should be able to restore it in your new CORE without any issues. From what I understand, it doesn't really matter what platform you run Roon Server or Core on - Docker, VM, Windows laptop, etc - the backups are not platform dependent, they're just dependent on the Roon Server software. A VM just to run Roon seems like a bit of an overkill to me, but I haven't had any issues with connectivity or anything (so far at least), so I can't really speak to whether a VM would be more stable in your network.1 point
-
So after checking influxdb.log as you mentioned to jibo, I'm having the issue of port 8088 being bound. I have that port in use on another docker service, and it wasn't listed in used ports so I wasn't aware of the issue. I fixed this by shuffling ports on my other docker service. Thanks for the lead on that, I was a bit blind to the log file inside of influx's folder, sorry.1 point
-
I have the same issue and it looks like it's related to an internal port 8088 Edit: I had another docker using that port. After changing that, it works now. 2020-09-22T19:48:12.501537Z info Go runtime {"log_id": "0PPqaULG000", "version": "go1.13.8", "maxprocs": 8} run: open server: listen: listen tcp 127.0.0.1:8088: bind: address already in use1 point
-
The answer seems to be yes. I copied everything over from the diagnostics/config to the rebuilt key, with all proper assignments. Hopefully this helps people, as we frequentely take diagnostics more often than we take backups of usb keys.(hell they are even backed up for us here on the forums ) This means we can rebuild a usbkey quite easily.1 point
-
@testdasi I’m down. Let me know if I can help. We can also coordinate new releases. I’m currently developing version 1.4. And I appreciate your kind words!1 point
-
It worked! Thanks!1 point
-
You can either edit the graph to change the parameters to use hddtemp or alternatively just wipe your config folder and reinstall with USE_HDDTEMP=no. The panels use SMART, not HDD_Temp. I only included the option because some prefer it over SMART (which is why it defaults to no). I kinda wonder if I should make a UUD edition that includes @falconexe's dashboard. That looks pretty damn sleek out of the box. Try use host network and in the nginx config file, change: set $upstream_app grafana; set $upstream_port 3000; to set $upstream_app 192.168.0.2; set $upstream_port 3006; (Replace 192.168.0.2 with the actual IP of your Unraid server). With bridge network (including custom), you have to map the ports yourself (it's the "Add blablabla" at the bottom of the Docker edit GUI). But that shouldn't be necessary with host network.1 point
-
New config allows to reconfigure the array devices keeping the existing data. So, tools -> New config - re-assign both disks (make sure not to assign a data disk to a parity slot) with disk2 using a SATA port and start the array, if both disk mount you're done, if disk2 doesn't mount, repeat the procedure with disk2 back in the USB enclosure, you'll then need to empty it before using a SATA port.1 point
-
wip https://forums.schedulesdirect.org/viewtopic.php?f=15&t=3107 to make it short, lets see what SD will do or say about it. from the author of g2g Apparently SD has changed something. The stationID is declared as a string in the SD API (left picture). The server responds with an integer (right picture)
 1 point
 -
Try just the new config first, if it works you won't need to do anything else.1 point
-
While it could be a serious hacking attempt, you mentioned you have netgear router, which is probably performing vulnerability scans as previously mentioned. Check the router's admin page and see if you can disable "armor". That should disable that "feature" of the router, if you don't want it.1 point
-
your pending sector count went up during pre-read, thats never a good sign, personally i wouldnt put this disk in my array (none of my disks have previously had or have pending sectors), but the choice is yours. btw bad cabling and a cheap psu should not cause pending sectors, that is more to do with 'crc error count'.1 point
-
There's no sdd in the root folder. Disks are in /dev folder; if you want to specify the disk by sdd the path is <source dev='/dev/sdd'/>1 point
-
try switching the order of the name servers in the env var 'NAME_SERVERS', perhaps there are name resolution issues with ns '209.222.18.222'1 point
-
Thank you Decto for the detailed issue track down instructions! The issue seemed related to the USB VL805 controller. A double reboot of the VM after removing the card made it work again. I messed up in the bios and swapped PCI slots but still no joy. Since the Fresco FL1100 based card is often indicated as a working one, I followed your advice and ended up getting one on-line, delivered in less than 13h. All I had to do is run the VFIO plugin, select as passthrough PCI device and Tadaaaa ! Immediately recognized. Working with a thumb drive. Conclusion I lost 2 days tinkering my config while I could just have spent 29€ and get it working straight away. I could have had it for 19€ from Amazon https://www.hagglezon.com/en/s/B00B6ZCNGM I'll update this post if I notice something wrong while actively using it. Thanks to rachid596 for reaching out too1 point
-
what is this? then it wont be related to my latest changes, qbittorrentvpn was built 21 days ago. @bigbangus @Kopernikus please can you both do this, do not cut the logs short i need to see the full log with debug turned on:- https://github.com/binhex/documentation/blob/master/docker/faq/help.md1 point
-
Newer versions of lilu, whatevergreen, applealc, virtualsmc require Acidanthera MacKernelSDK for compilation, otherwise they will fail. More info: https://github.com/acidanthera/MacKernelSDK1 point
-
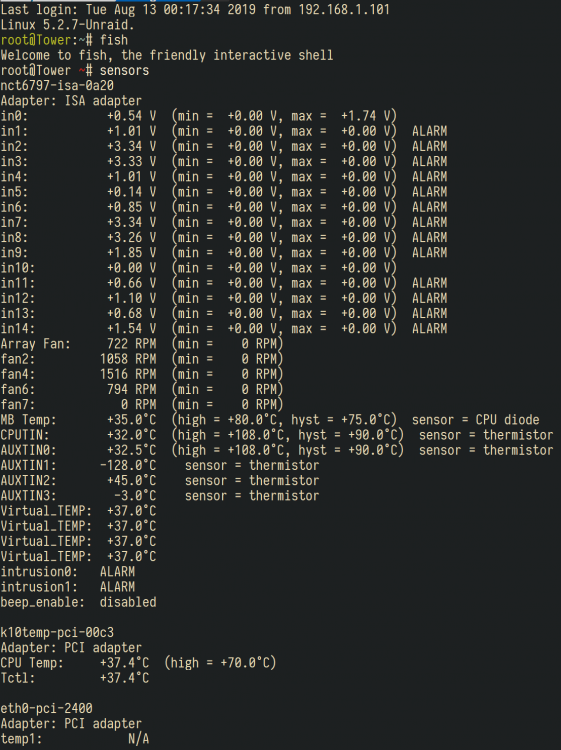
Ok, I might give it a shot when I have some time to test adding my UPS. And ofcourse, I understand that it´s nearly impossible to cover all unique combinations of hardware. Just thought that since all other CPU sensors where read right, maybe it was just a little "issue". I´ll check and see if I can fix the right settings for reading my CPU temp. And thanks again for a superb docker1 point
-
Are you sure that you're using the correct .ovpn file? Is ca-toronto.privacy.network = ca.torronto.privateinternetaccess.com? A wild guess, but are you using the .ovpn for the newgen endpoint?1 point
-
That was it! Thanks the solved my login loop problems. Also thanks for dockerizing flood UI! I had one more question, which isn't an issue or anything. I realized that upon starting, the docker image creates 2 folders `rtorrent` and `sabnzbd` each with their own watch folders. I already have a folder for torrents and watch folders. How can I have hyrosa read from my existing ones, such that even upon restart of the image my settings will be respected?1 point
-
Sweet. Glad you got it working. I updated the install/dependencies sections on post 1 to include this explicitly for the Telegraf config. Just in case anyone else isn't clear on it or forgets that single line. Cheers!
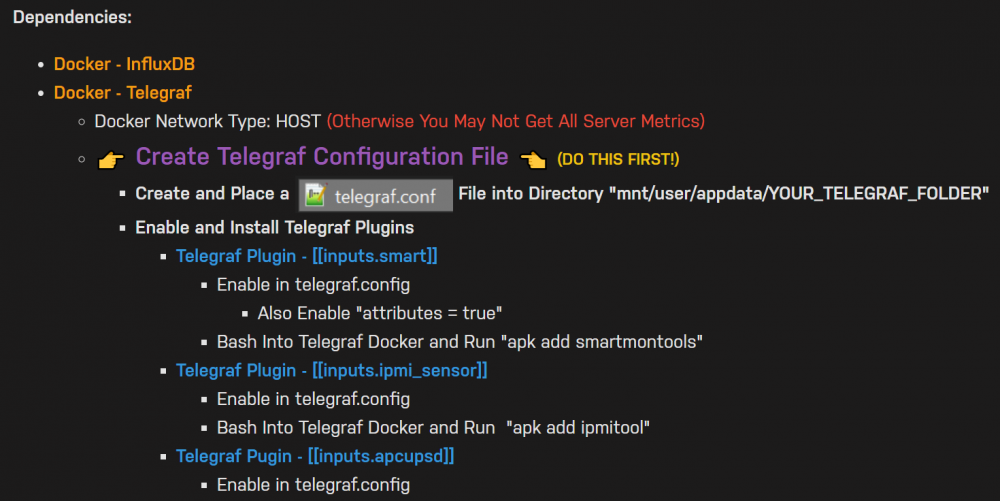 1 point
 -
Hi SPOautos, thank you for the offer. I think knowing that you got it working kept me motivated to try I can report now that the passthrough is working. As to how exactly, I don't really have a clue, but I'll describe the situation maybe future users can pick out the relevant bits. Issues: I think I've inherited some VM issues from the recent hardware upgrades. I upgraded from Xeon to Ryzen, and kept all the VMs which were created on the old hardware. Also the VM I'm using is Windows 8.1 (not windows 10), because I have a PRO license for it, to use Remote Desktop Connection. I read on Reddit that one should remote connect with streaming software and not to use RDC, something about the protocol and stuff. My newbie solutions - no hex edits; no xml edits (confirmed to be working): Created a NEW VM, using Windows 10 (I can also confirm that RX580 passthrough on a new Windows 8.1 VM does not work). Used VNC to install TeamViewer. Used TeamViewer to install RX580 drivers. My Graphics ROM BIOS field is left blank (I don't know exactly how it works, but I've tried many vbios version as described in earlier posts), but left blank seems to work, so why change it... Think some luck is involved, after starting the VM, and seeing a black screen, I went on to reading forums on the other computer. Prob after couple minutes delay the screen just came on... I tried to passthrough the keyboard and mouse afterwards (quite straight forward, just 2 checkboxes in VM settings), that seems to have messed with the GPU passthrough which didnt work for a while (even when all the settings were the same as before, when it did work :s). Anyways, after a few VM restarts, everything seems to work again................... Luck I tell you, this doesnt make sense to me.... The USB keyboard, mouse, and GPU passthrough continues to work now, haven't encountered any of the delays described in the dot point above. System info: AMD RYZEN 7 3700x; ASUS Radeon RX580 Dual OC 8GB (only one GPU); ASUS TUF Gaming x570-plus; Corsair Vengeance LPX 32GB (2x16GB) DDR4; Unraid 6.8.3 Windows 10 VM setting (Q35-4.2; OVMF; passing both RX580 GPU and Sound) Bottom line, I wanted to thank you. Many other posts were quite discouraging, things like RX580 wont work as the only GPU, or AMD GPU difficult to passthrough etc etc. Knowing that SPOautos got a similar setup to work kept me going. If anyone else runs into this problem, hope they find this thread helpful1 point
-
sounds good.1 point
-
OK, four will be better but in most case you can't found benefit. You have 8 slot, so you have much room for expand. The internal connector are SFF-8087 but I can't found your setup have any SFF-8087 socket ( exclude blackplane ), so I ask where you connect this. ( Does your mainboard use SFF-8643 ? ) Straightforward topology was two port from mainboard, then one to blackplane and other one change to external.1 point
-
OK guys, multi remote endpoint support is now in for this image please pull down the new image (this change will be rolled out to all my vpn images shortly). What this means is that the image will now loop through the entire list, for example, pia port forward enabled endpoints, all you need to do is edit your ovpn config file and add the remote endpoints at the top and sort into the order you want them to be tried, an example pia ovpn file is below (mine):- remote ca-toronto.privateinternetaccess.com 1198 udp remote ca-montreal.privateinternetaccess.com 1198 udp remote ca-vancouver.privateinternetaccess.com 1198 udp remote de-berlin.privateinternetaccess.com 1198 udp remote de-frankfurt.privateinternetaccess.com 1198 udp remote france.privateinternetaccess.com 1198 udp remote czech.privateinternetaccess.com 1198 udp remote spain.privateinternetaccess.com 1198 udp remote ro.privateinternetaccess.com 1198 udp client dev tun resolv-retry infinite nobind persist-key # -----faster GCM----- cipher aes-128-gcm auth sha256 ncp-disable # -----faster GCM----- tls-client remote-cert-tls server auth-user-pass credentials.conf comp-lzo verb 1 crl-verify crl.rsa.2048.pem ca ca.rsa.2048.crt disable-occ I did look at multi ovpn file support, but this is easier to do and as openvpn supports multi remote lines, it felt like the most logical approach. note:- Due to ns lookup for all remote lines, and potential failure and subsequent try of the next remote line, time to initialisation of the app may take longer. p.s. I dont want to talk about how difficult this was to shoe horn in, i need to lie down in a dark room now and not think about bash for a while :-), any issues let me know!.1 point
-
I have a new version of smartctl build on 7.2 and the revision r5083 as of yesterday. Use at own risk. Talking to devs to get my changes added will post once ticket is raised. smartctl 7.2 2020-09-19 r5083 smartctl1 point
-
We have indeed made a lot of progress in this thread. I now have a temporary stopgap solution running on my system that seems to work very well (SAS drives spin down in sync with Unraid's schedule, no sporadic / unexpected spin-ups). Since quite a few people expressed interest in this, I thought I'd share this stopgap. So I packaged it into a single run-and-forget script. We can use it until Limetech puts the permanent solution into standard Unraid code. To use, simply place the attached script somewhere on your flash drive (e.g. /boot/extra) and run it like so: bash /boot/extra/unraid-sas-spindown-pack It should be effective immediately. Assuming it works well for you, you can add a line in your "go" script to run it upon system boot. Essentially, it does the following: 1. Install a script that spins down a SAS drive. The script is triggered by the Unraid syslog message reporting this drive's (intended) spin down, and actually spins it down. 2. Install an rsyslog filter that mobilizes the script in #1. 3. Install a wrapper for "smartctl", which works around smartctl's deficiency of not supporting the "-n standby" flag for non-ATA devices. When this flag is detected and the target device is SAS, smartctl is bypassed. As always, no warranty, use at your own risk. It works for me. With that said, please report any issue. Thanks and credit points go to this great community, with special mention to @SimonF and @Cilusse. EDIT: Just uploaded an updated version. Please use this one instead; previous one had a small but nasty bug that sneaked in during final packing. Apologies. unraid-sas-spindown-pack1 point
-
Lots of questions in this thread, but not many answers. I'd answer a few, but I don't know the answers either.1 point
-
Dev here! You can find the interval over in the settings, it's in the Main tab, called "Check interval". See attached image for reference. Let me know if you have any other questions!
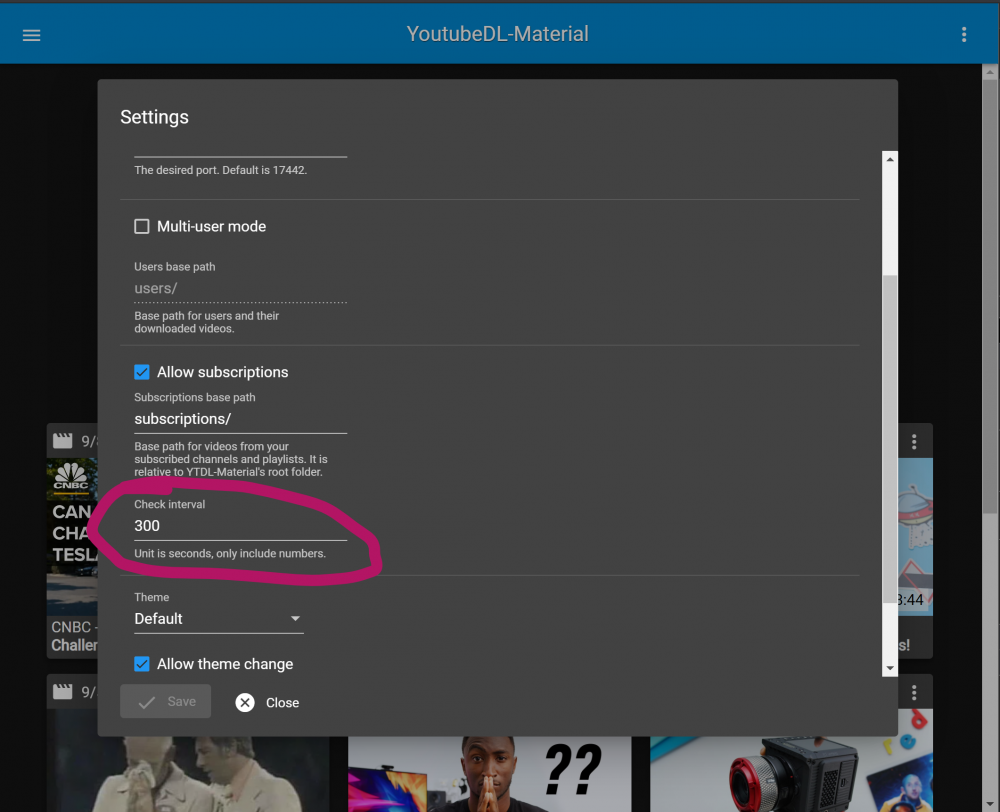 1 point
 -
It's likely checking for trim support, WD SMR drives report they do, if that's true plugin could check if the drive is non rotational instead.1 point
-
You need to format the disk in Unraid before use, next to array start/stop buttons.1 point
-
This would be nice... Click SWAG...1 point
-
I added the following to my reverse proxy for the admin panel location /admin { return 404; } I only access the panel locally using the direct ip.1 point
-
Ok, here is everything you need to do to get this working. First edit bitwarden container then click on "advanced" Extra Parameters: -e LOG_FILE=/log/bitwarden.log -e LOG_LEVEL=warn -e EXTENDED_LOGGING=true Then add path: container path: /log host path: /mnt/user/syslog (unraid share you want bitwarden to log to) access mode: read/write #apply/done Next edit letsencrypt container then add path: container path: /log host path: /mnt/user/syslog (unraid share you want bitwarden to log to) access mode: read/write #apply/done Now edit ../appdata/letsencrypt/fail2ban/jail.local * at the BOTTOM of the file add: [bitwarden] enabled = true port = http,https filter = bitwarden action = iptables-allports[name=bitwarden] logpath = /log/bitwarden.log maxretry = 3 bantime = 14400 findtime = 14400 #save/close Then create and edit ../appdata/letsencrypt/fail2ban/filter.d/bitwarden.conf and add: [INCLUDES] before = common.conf [Definition] failregex = ^.*Username or password is incorrect\. Try again\. IP: <ADDR>\. Username:.*$ ignoreregex = #save and close #restart letsencrypt container ***Testing Use your phone or something outside your lan and once you fail 3 logins you will be banned. To show banned ips and unban enter the letsencrypt console from the docker window. Lists banned ips: iptables -n -L --line-numbers Unbans ip: fail2ban-client set bitwarden unbanip 107.224.235.134 exit -End1 point
-
I pre-cleared my drives, then put them in an array. Brought the array up and started testing a few things. Decided I wanted to change the array around a bit, opted to reset the configuration: UTILS -> NEW CONFIG. Showing (blue) on all the drives.. do I have to pre-clear these damn things again?1 point
-
No. New config tells unraid to discard parity and get ready to recalculate it based on the new set of drives. You will just need to let it rebuild parity, and it will leave the data drives contents as they are.1 point
-
Related to this, something we're constantly asked is, "can you increase the number of disks in the array to X?" Many have asked for an X of 20, some 24. What we are going to do is create a Pro-only feature that raises the array width max up to 32, but also includes the ability to configure a "Q-parity" drive (like RAID-6). This drive will have similar size restriction as Parity drive, that is, just be larger or same size as any data disk. In this system (as in a RAID-6 system), there will be two redundancy disks, "P" which is the ordinary XOR parity, and "Q" which is a Reed-Solomon code. This will allow unRAID to recover from any 2 disk errors, with minimal performance impact.1 point

.thumb.jpg.0c644260dacbdbc011d7ad8ba9a1c10a.jpg)